Pizza Dough Secrets: How to Make Thin Crust Pizza Dough

Learning how to make the perfect pizza dough can be frustrating. In this recipe video, we share our pizza dough secrets for making the best dough for a traditional Italian thin crust pizza. This is a simple, basic pizza dough recipe that does not include fat. There are many tricks to achieving a tasty, homemade pizza dough that rises into a beautiful pizza crust, such as making sure your ingredients are at right temperature, using half bread flour for a stronger dough and half all-purpose flour for a nice rise, substituting honey for sugar to help caramelize the crust and not including a fat like olive oil in the dough–just to name a few. This demonstration will also help you understand what happens when your dough is too hot or too cold or why it’s not rising, why you do not want to include a fat in your dough and more. Watch the video for all our pizza dough secrets and scroll down for the written pizza dough recipe.
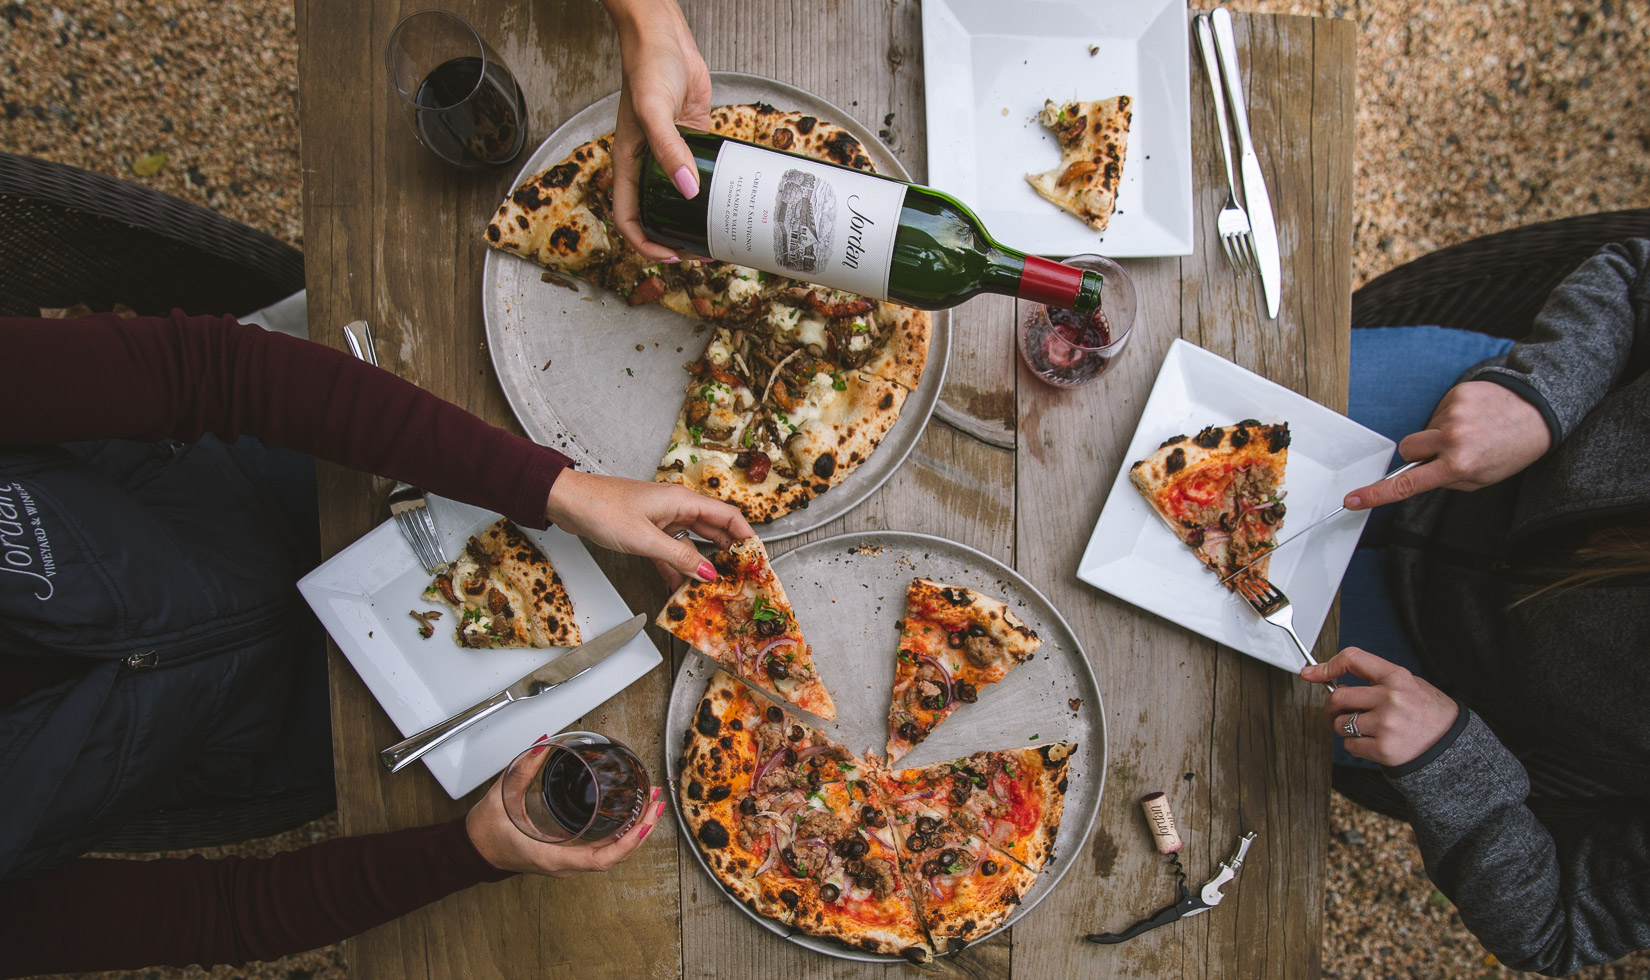
You can choose your own toppings for this recipe, but one of our favorite pizzas for pairing with Jordan Cabernet Sauvignon is a simple pizza without red sauce, topped with Mt. Tam cheese, Maitake and Royal Trumpet mushrooms, Aleppo crushed red pepper flakes and a drizzle of Jordan Extra Virgin Olive Oil.
If you’re looking for interactive, hands-on instruction, join us at Jordan Winery for our farm-to-table Pizza Cooking Class.
Jordan Winery Pizza Dough Recipe
Video Transcription
Today what I wanted to do is show you how to make a really basic pizza dough recipe and I’ll show you the techniques and tips that I use so that it’ll be really easy for you to get the best flavor and texture out of your dough at home. The basic ingredients we use here are bread, flour, and all-purpose flour. We have salt, instant yeast, water, and honey.
The flour will be the backbone of your recipe, we use bread flour because it does have more protein in it, it’ll be a denser product, it actually will make it a stronger dough. That’s good because it can hold up under the weight of toppings for your pizza and still be able to rise nicely. But you also don’t want a very dense dough. Using half-all-purpose flour will help balance that out.
The yeast obviously is the leavener but also has a lot of the flavor that you expect to get out of that. Honey, most recipes will have a little bit of sugar of some form, because that is what feeds the yeast. When you put that in the recipe, the yeast has more food, it’s going to rise better and give you a better flavor. And it also helps your crust to brown. It’s a caramelizer, you’ll have a nice crispy crust rather than a pale and pasty type crust.
The same thing for the salt, the salt strengthens the dough, but it also helps with the crust and the flavor. And all around gives you a stronger dough, you want to get your dough within a certain temperature most recipes you see will tell you to just use more water. And that usually is okay.
But what I do is I take the temperature of the flour before the start and you want your dough to end up somewhere between 75 to 79 degrees, and that way you get the best rise out of it. I’ve taken the temperature, I usually have a thermometer of some form. The flower right now is about 65. I want my water to be about 91 degrees to get it within that range, it just makes up for the difference in temperature with the flower. You want to start off with your water. And to that, you’re just going to add your yeast and your honey. And then I just usually whisk it to make sure it starts dissolving and none of it is left at the bottom of the bowl.
If you do too hot, what happens is it rises a lot faster than it’s supposed to. And then you’ll end up with it across it, or dough that got so tall and rose so high that it can’t even support its structure, it’ll end up collapsing. And it’ll be really crusty and crumbly, and it’ll taste like this alcoholic flavor from the yeast. And if it’s too cold, what happens is it never really rises, never develops the structure or the flavor, you end up with a sticky, pale crust. If you can get it within that temperature range, that’s the best. You add your flour on top. And I leave the thought out for right now this is a different technique. It’s very simple but explains why. And with these ingredients, you just want to mix it for about one minute just to get it together.
I will cover this now and you let it sit for about 15 minutes to rest. And that gives the flowering time to develop into the dough. And one thing that’s different about this recipe versus many pizza dough recipes that you find is that there’s no fat in it, a lot of them will call for olive oil. And the reason why is I’ll show you an example. This is a brioche dough. This has a lot of fat in it. And what that does is it gives you a really fine even crumb to your final product. And I’ll show you a recipe. This is a dough that has no fat in it CC so that the fat doesn’t bend around the molecules. You’ll have really nice air pockets that can develop and expand without any fat. And that’s something that you’re going to get out of this dough. You’ll have a lot of nice air pockets in there to give you some good texture. Now that the dough has been sitting for about 15 minutes, we’re going to go ahead and add our salt and just dump it in on the top. And now you’ll continue mixing the dough for about another two to three minutes. And generally, if you had done it the conventional way, you would be mixing for six or eight minutes so this is really going to protect the flavor really nicely.
Okay, at this point your dough is ready. This is what you want it to look like it shouldn’t be shiny, it shouldn’t be lumpy or sticky. You can see here it’s one nice big mass. I’m going to transfer it to a bowl so that it can rise and In order for it not to stick to the bowl when I’m ready to use it, I always use some sort of vegetable spray. That way, it’s really not adding fat into the recipe if you were to coat the bowl with olive oil, and usually just use a dose scraper to get it all out in one nice big piece. Here’s your dough, we’re gonna leave it in this bowl in a warm area. And it’ll rise. It takes between a half-hour and sometimes an hour if your room is a little cooler. And of course, again, you want to have it covered while it says that.
Here’s the final dough. This is ready now to divide, you see that it’s nicely doubled. You can turn it on at your workstation, you can either use it again, a vegetable spray on your station if you want, or you can use flour. Most people use flour. You have a clean workstation, and then you flour your area and just turn your dough out there.
You can do whatever size dough you want, you could do freeform, I always do about six ounces. I have a scale here ready. Sometimes you’ll see people just rip the dough with your hands. And what you’re doing is you’re ripping the strands of gluten, and that’s holding a lot of your air. You’re really destroying the structure. I use something sharp, like this bench scraper to cut through. And then that way you just cut off the dough, you’re not destroying it, it’s a really gentle way to handle it. Also, put flour on the scale so that it won’t stick. Alright, I’ll portion these out, you’ll get this is what I did, I did a double recipe on the earlier on the dough that I wanted to bring out to you. But what I demonstrated for you is half of a recipe or one full recipe because that’s something that will fit in a typical mixer that you have at home. This is going to give me about eight doughs. But what you’re going to get from the recipe that we post will make about four pizzas, sometimes five, depending on the size that you want to get. Right now you’re just scaling it for the right weight. And then you’re gonna shape it once you’ve got all these at the right weight that you want. I’ve portioned all my pieces out and I do have a little extra that happens sometimes. And what I’ll just do is I’ll just put it on the bottom of the dough, just kind of split it up evenly. Or you can make a small pizza, whatever you want it to do with that doesn’t really matter. I’ll put it on the bottom, so that once you roll it, it’s kind of text itself into the dough, rather than being a lump on top. And now that those are portions, you’re ready to shape it.
This is a pre-shape. That’s really easy to do. I usually roll it with my hands, but another way you can do it is to tuck it. You just kind of pull from the center and tuck it underneath into the bottom until you see it nice, clean, smooth, round top. And what you’d look for on the bottom is just a seam like this. And then I’ll usually put it to rest on top of cornmeal or semolina. And then it’ll sit and rest. You don’t want to use it right away. Because when you work with the dough, the gluten gets tough and it wants to contract every time you try to roll it out, it’s just gonna keep shrinking, you need to let it rest at least 20 minutes in order to get a better stretch out of it.
Okay, if you’re going to do it by hand, this is how I do it. I use my thumbs and my pinkies to kind of guide and direct, I use my thumb to pull some dough into it and then tuck it into the bottom, and then you just keep rotating it till you’ve gone all the way around. And then you get a nice tight circle. And again, you see on the bottom is where you’ll see all the extra. Now that they’re shaped, you want to put them somewhere where they can rest. What I did last night is put cornmeal on the bottom. It looks like a big container, but I spread them apart because they’re gonna spread out a little bit by the next day. You can use them in 20 minutes if you want. But this dough will also last up to three days in the refrigerator. And if you let it sit a little bit longer, you actually develop some more flavor so I usually like to make it the day before and it’s also a lot easier to work with once it’s sat overnight. You can put some cornmeal on the bottom of your container and put out your dose. If you put cornmeal on the bottom, it’s not gonna stick if you put flour, the dough ends up absorbing the flour and sticking to the bottom of your container anyway, the cornmeal just kind of creates a nice barrier between your container and your dough and protects it.
I’ll show you how you want to shape your pizza dough. You want to generously flour your workstation. If you get too much flour on it. That’s fine. You can always wipe it off. And a lot of times you’ll see people use a rolling pin to shape this I’ll put a little flower on. But I don’t like to do that because that just pushes all the air out and flattens it and all the air that you’ve worked really hard to create. For the texture, I was taught to use my fingertips. And what you’re doing is you can see there are still air bubbles around here, you’re just moving the air around, you’re not flattening or destroying it, it’s still in there, you’ll still have some nice texture. And then when you’ve stretched it about as far as you want, you grab it with the back of your hand, and you just gently stretch it out. And then I’ll go around the crust or the edges about once and that’s ready if you want it thinner then you keep stretching it if you want to the thicker crust, then you could probably either shape it smaller or push it back together. And then when you put it into the oven, you’re going to want to put cornmeal here on your paddle, and that keeps it from sticking to the paddle when you transfer it into the oven. I put this on. And before even adding my toppings, I’ll do a test just to make sure that it will fight off. If it sticks to this at all.
As you’re putting it in the oven. Part of it will fall back and you’ll have a deform pizza. You see that it’s moving around really well, it’s not stuck and you can go ahead and start putting your toppings on now. Alright, and so just to be efficient, you want to have all your toppings ready and out. I’ll just show you a basic Margarita Pizza. That’s usually fresh mozzarella, and I use some heirloom tomatoes also from our garden. And what’s the really nice oven here that we have, it’s about 600 degrees like I said, so it will bake these in about three minutes. It’s a really fast process and it just puts some fresh mozzarella on here. You can put as much or as little as you want. It’s really up to you. It doesn’t have to look any certain way. And then I’m ready to go in the oven.
Here the pizza just takes about two-three minutes in the oven and it’s ready to be white. You could add some olive oil, put some of our state oil on here and finish it off with some basil from the garden. Really you see this dough is really easy, anyone can make it gives you a really beautiful rustic looking pizza and you can have fun putting whatever toppings you want. We hope that this recipe is something you’ll use at home and please feel free to ask us if you have any questions, leave a comment and we’ll be happy to respond and thank you for watching.